To ensure uninterrupted advertising, it's crucial to promptly complete the "Advertiser Verification" process for your Google Ads account. Starting from mid-September 2023, verification has become mandatory for many advertisers. As an added perk, verified accounts can also display their company name and logo in the sitelinks of their ads.
All you have to do is go to https://ads.google.com/ , click on Tools and Settings -> Billing -> Advertiser Verification and follow the steps.
For those of you who want to see the full steps, check at the below:
Steps
1. Login to Google Ads Account
Go to ads.google.com and make sure your logged into your Google account that manages your ads.
2. Click on Advertising Verification
Tools and Settings -> Billing -> Advertiser Verification

3. Follow All Steps
Step 1 - Start Verification

Step 2 - Tell About Your Business
Fill in the relevant answers to your business.

Step 3 - Verify Business and Address

Step 4 - Enter Organization Name and Address

Step 5 - Submit Documents
Any of the below are permitted - CP 575, EIN, Form 8871,8872, 990, Business Registration, SEC Filing (10-K, 10-Q, 8-K), Business Credit Report

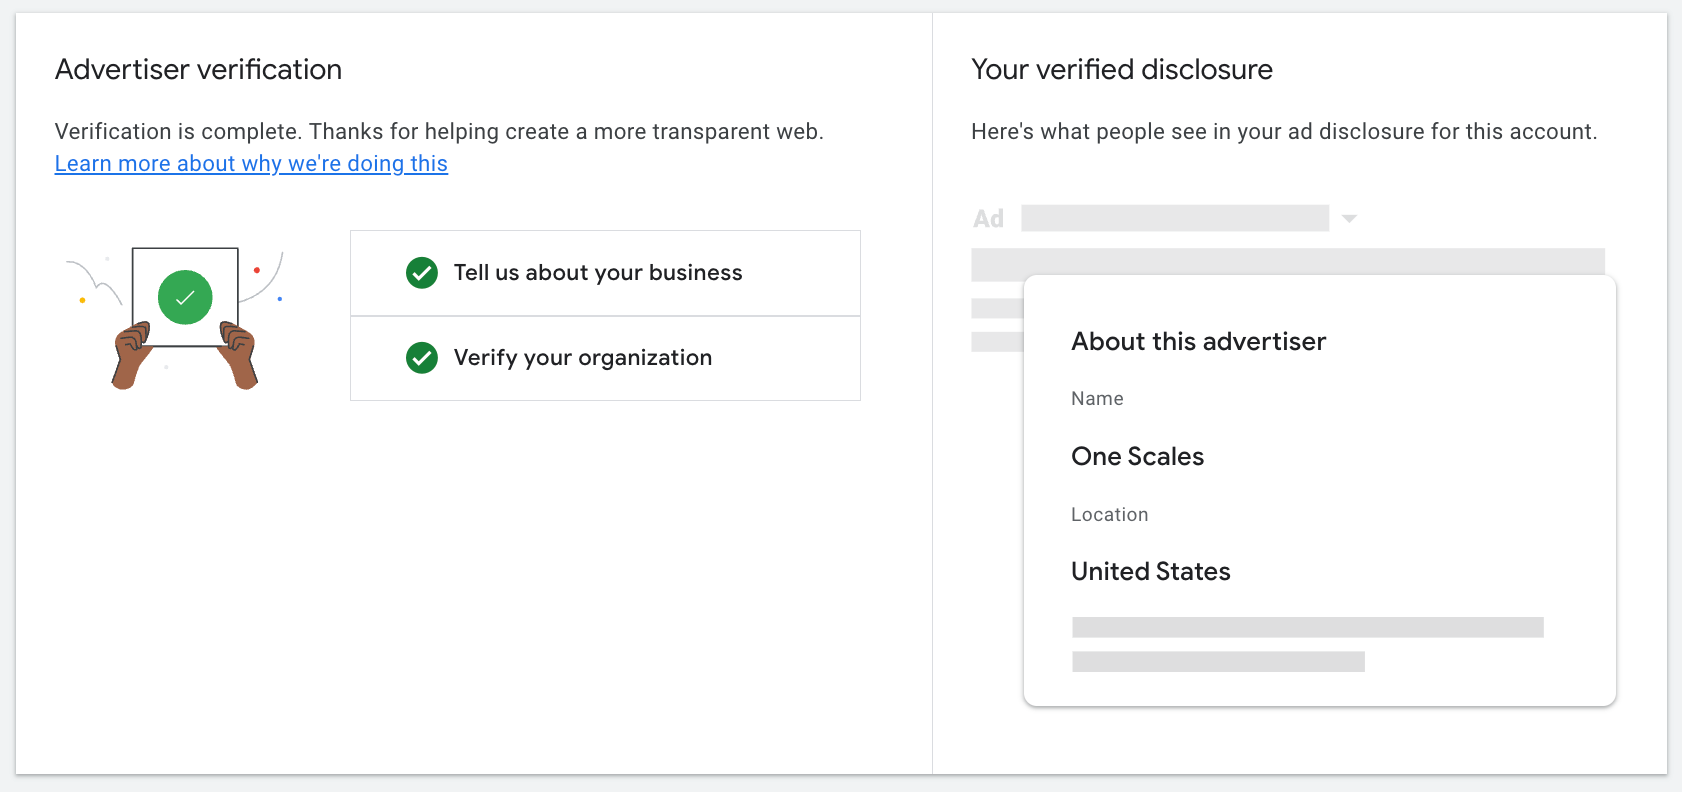
Step 6 - Submission Success

4. Wait 3-5 Business Days
Wait for Confirmation Email

6. (optional) Add Company Name and Logo to Sitelinks
For Search Campaign Sitelinks, Go to Campaign -> Ads & Assets -> Click on Add (+) -> Create Business Name and Logo to Be Used in Your Ads