Efficiently managing URL redirects is crucial for the user experience and SEO of your website. In this article, we’ll introduce you to Cloudflare’s Redirect Rules, which come in two types: Single Redirects and Bulk Redirects.
Example and Context
Suppose you are running an e-commerce website and recently revamped it. Your website structure has changed, and the URLs have been modified. To ensure users and search engines find the new pages when trying to access old URLs, you must implement URL redirects. Some website redirects are simple and few and some are complex and need to be automated.
Solution
Cloudflare offers two types of redirect rules: Single Redirects and Bulk Redirects.
Single Redirects
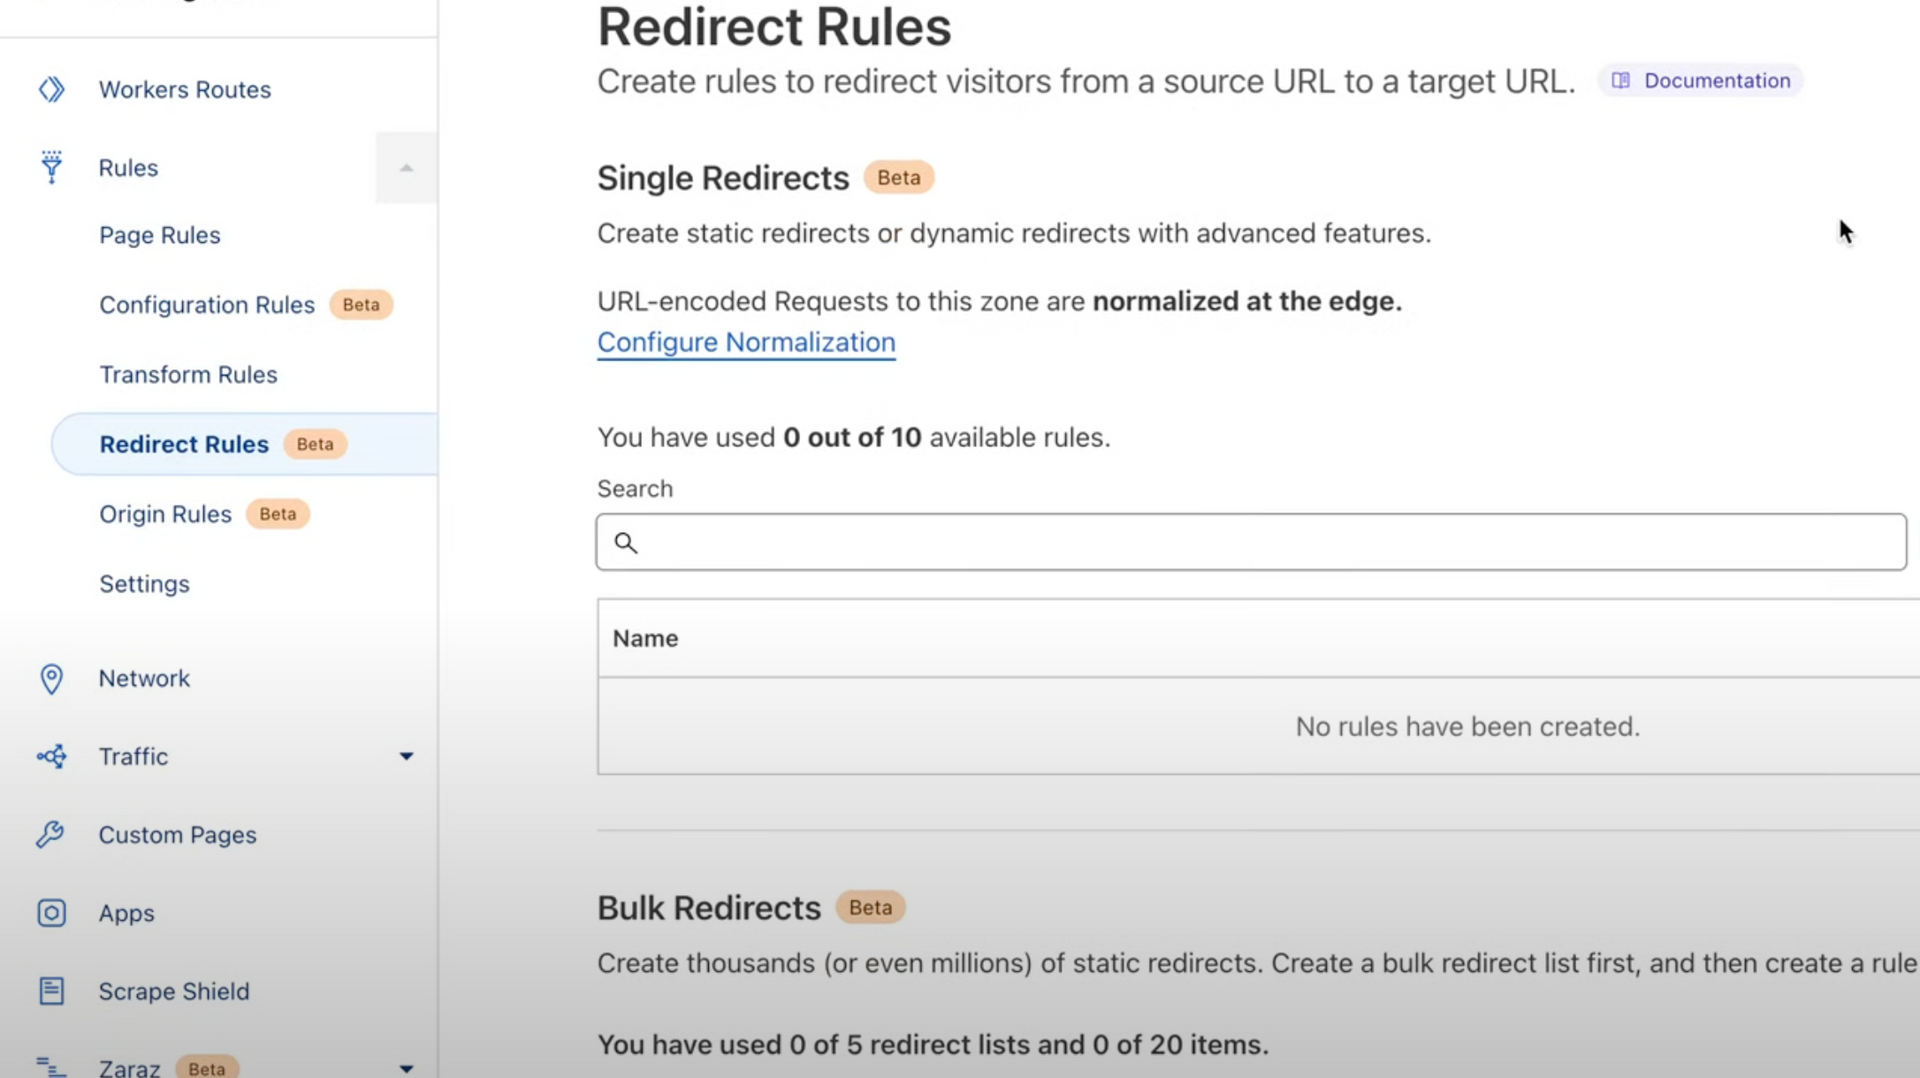
Single Redirects are used for redirecting a limited number of URLs. They are particularly useful for scenarios like redirecting an old contact page to a new one, or changing the domain name.
To set up a single redirect:
- Log into your Cloudflare account and select the domain you want to manage.
- Navigate to the Rules section and choose 'Redirect Rules'.
- Click 'Create' and enter the name for your redirect rule.
- Specify the condition to match (e.g., if the URL is ‘domain.com/contact’).
- Set the target URL where the user should be redirected.
- Choose the type of redirect - 301 (permanent) or 302 (temporary).
- Optionally, set up dynamic conditions using expressions. For example, you can redirect users based on their country or the language their browser is set in.
- Save your rule. You can either save it as a draft to enable later or deploy it immediately.
Bulk Redirects
Bulk Redirects are designed for handling a large number of redirects. This is useful for extensive websites where managing redirects one by one is not practical.
To set up bulk redirects:
- In your Cloudflare account, navigate to the Account section.
- Select 'Lists' and click 'Create a new list' for Redirects.
- You can manually add source URLs and their corresponding target URLs, or upload a CSV file with this information.
- Assign a status code, and optionally, choose parameters like 'Preserve query string', 'Include subdomains', or 'Subpath matching'.
- After creating the list, go to the Redirect Rules section.
- Create a new rule and select the list you just created.
- Save and deploy the rule.
Key Takeaways
- Single Redirects are for a limited number of redirects and are managed within the domain.
- Bulk Redirects can handle a large number of redirects and are managed at the account level, which can be useful if you manage multiple domains.
- You can set conditions for redirects based on various parameters.
- Bulk Redirects allow you to upload a CSV for massive lists of redirects, making it easier for large-scale websites.
Summary
Redirects are an essential part of web management, especially when you make changes to your site’s structure or move to a new domain. Cloudflare offers Single and Bulk Redirects to suit different needs. While Single Redirects are best for handling a few redirects, Bulk Redirects are more suited for large-scale operations. Remember to consider the implications of your redirects, such as SEO impacts and user experience.


