
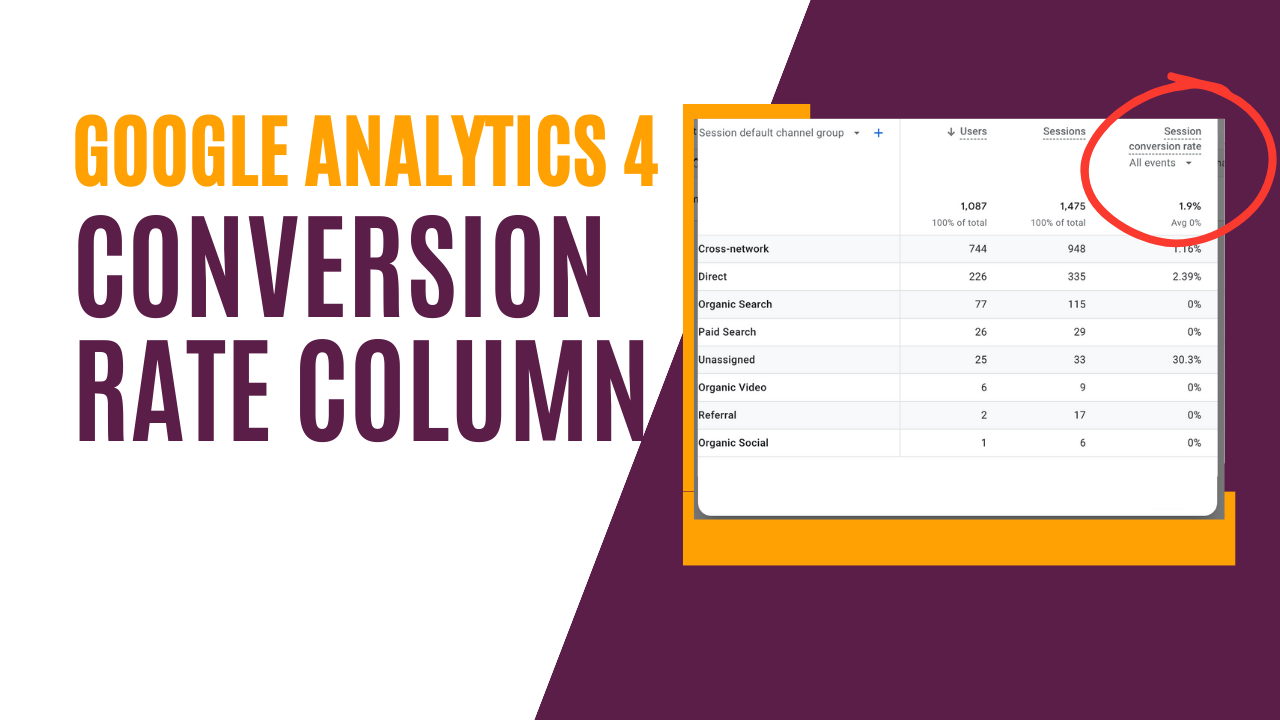
Everybody has been wondering what happened to the "conversion rate column" in Google Analytics 4. We used it extensively in Universal Analytics (UA), and it's natural to feel its absence. This simple guide will walk you through the process of adding it to GA4.
How to
-
Ensure Admin Permissions: Before proceeding, confirm that you have admin permissions in your GA4 account. Without these rights, you won't be able to make the necessary changes.
-
Navigate to Your Report: Head over to the report where you wish to see the conversion rate.
-
Customize the Report: On the top right-hand side of the interface, you'll notice a pencil icon. This is the "customize report" option. Click on it.
-
Select Metrics: Once inside the customization menu, click on the "metrics" option.
-
Search and Add "Conversion Rate":
- At the bottom of the metrics menu, there's a search bar. Type in "conversion rate".
- From the search results, add both "session conversion rate" and "user conversion rate".
- Session Conversion Rate: This represents the percentage of sessions in which any conversion event was triggered.
- User Conversion Rate: This metric shows the percentage of users who triggered any conversion event.
-
Rearrange Columns: You can drag the newly added conversion rate metrics to your preferred position in the columns list. Remember, placing them higher up will display them more to the left in your report.
-
Save Your Changes: Once satisfied with the placement, click the "Save" button and "save to your current report".
-
Return and View: Head back to your report and view your new columns.
-
Important Notes:
- Only events marked as conversions will appear in these columns. If you need to designate an event as a conversion, navigate to "admin" -> "data collection and modifications" -> "data display". Here, you can select which events should be counted as conversions.
- The conversion rate columns come with a dropdown menu. Use this to view the conversion rate for ALL conversions or to focus on a specific conversion by making a selection from the dropdown.